
First let me start off my saying there are lots of different techniques and styles of dyeing fiber and this is the way "I" dye my fiber. I call it the lazy/impatient/lack-of-space way of fiber/yarn dyeing in 10 easy steps.
Supplies needed:
-Fiber and/or yarn
-Large pots or bowls
-water
-dye
-plastic wrap
-squeeze bottles - used only for this purpose
-white vinegar
-glass microwave safe bowl - used only for this purpose
-Microwave
-Sink
Many people will tell you to do this in the backyard or garage and stay out of the house, although that is a wonderful idea, I live in an apartment building and I don't have the luxury of a backyard or a garage, and since the kitchen has the water, microwave and sink, this is where I do my dyeing.
Step 1:
Soak your fiber for at least 30 min before attempting to dye it.
The dye takes much better to fully wet fiber. Don't worry about using your food bowls for this step, no dye is going in there - just make sure you wash it well.
Step 2:
Prepare your work area, you can cover your counters with newspaper and then add a layer of saran wrap to put the fiber on. Since I don't do any cutting on the counter and I am hoping to get a new one I skip the newspapers - oh also because I am LAZY.
Step 3:
Squeeze out the fiber and lay it out on the plastic wrap. Spread the fiber out a bit to give you access to the inside of the skein or roving.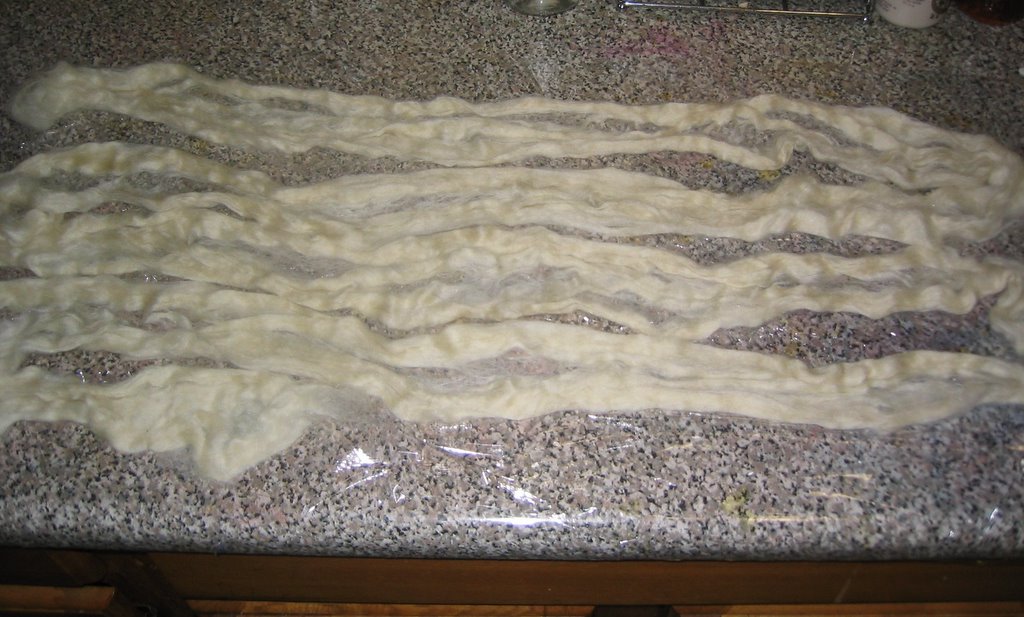 Since I have limited counter space I snake it out, if you have more space feel free to make one long snake - you will have more precise color separation.
Step 4:
Prepare your dyes - there are lots and lots of dyes to choose from. The ones I use are Procion MX, they are fiber reactive dyes and work for both plant and animal fibers. The reason I started with these dyes is because they are readily available in most art supply stores. I have amassed quite a few colors, 19 to be exact. Although I have taken the time to only use the primaries and mix my own secondary and tertiary colors, since this is the Lazy way I have all the colors I need (and then some) right here: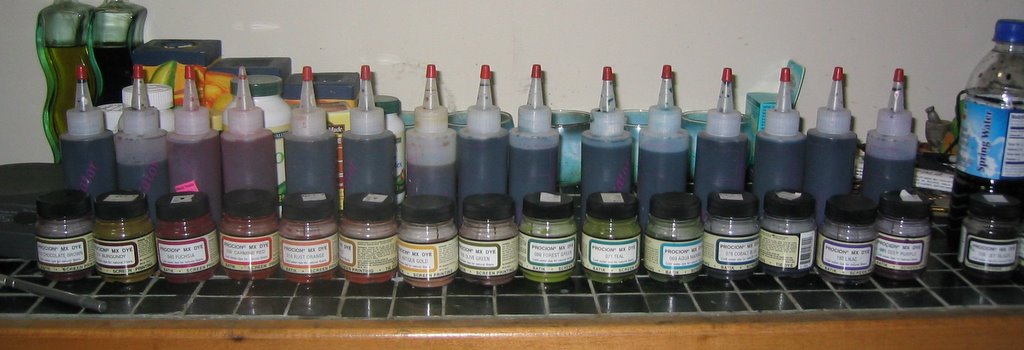
From what I know, these are not toxic dyes but you can become very allergic to them if you don't take some precautions. When working with the dye in powder form make sure you use a mask - the powder form is the hazardous state. I don't really measure the dye I just place about a 1/2 teaspoon into my 8oz squeeze bottle and then add to this a glug or two of vinegar. Once the dye is fully mixed with the vinegar I fill the rest of the bottle with tap water and give it a shake.
Step 5:
Start squeezing out some color onto your fiber. You could premeaure out sections of fiber, squeeze a bit of dye into each section and then take a foam brush and neatly press the dye into only whose sections - but I don't have the patience for that. I squeeze away either randomly or with some kind of pattern.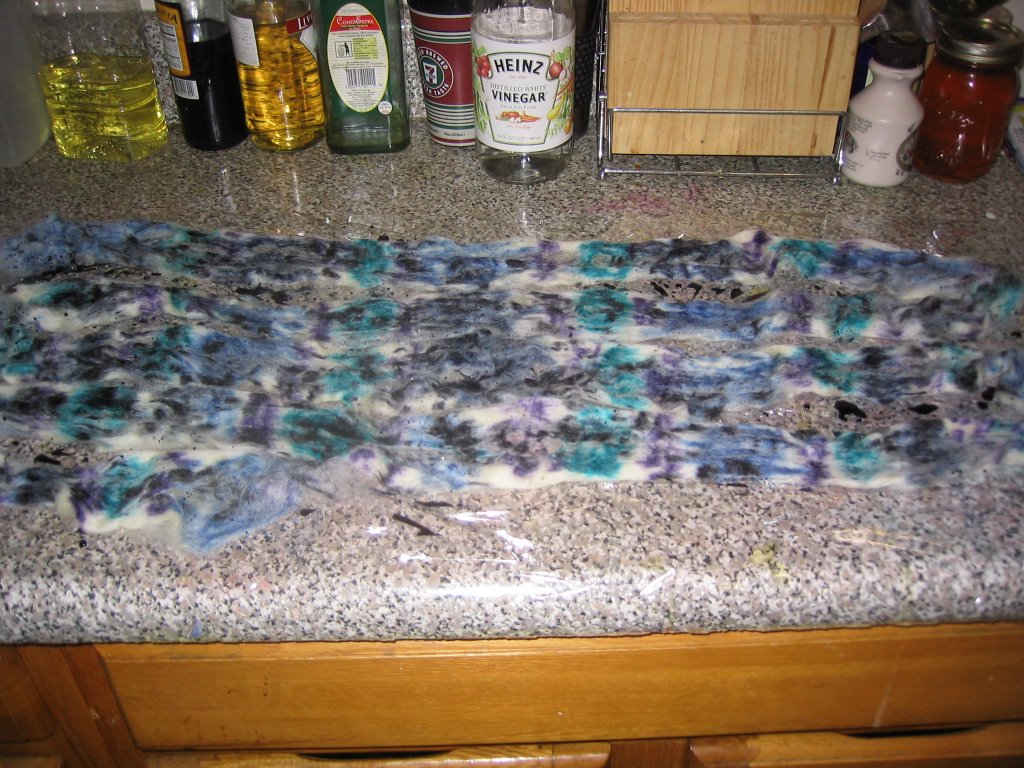 Go crazy, use color families, or lots of contrasting colors. If you don't like the dye job you can always overdye it!
Step 6:
Wrap it all up in the plastic wrap.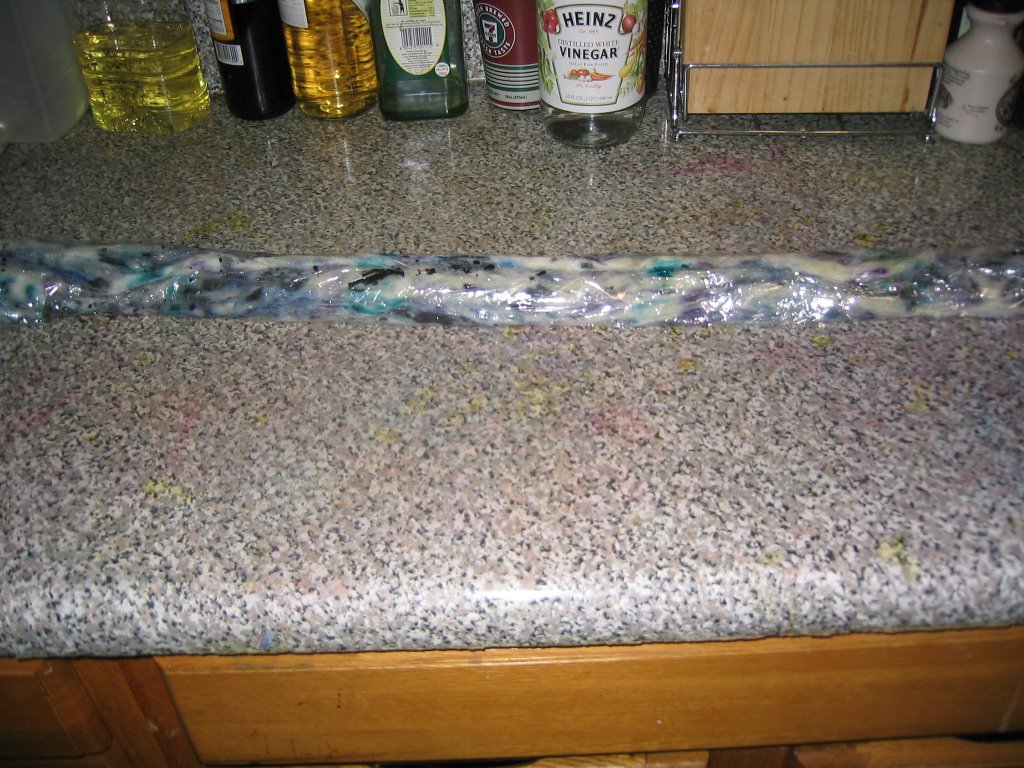 like this:
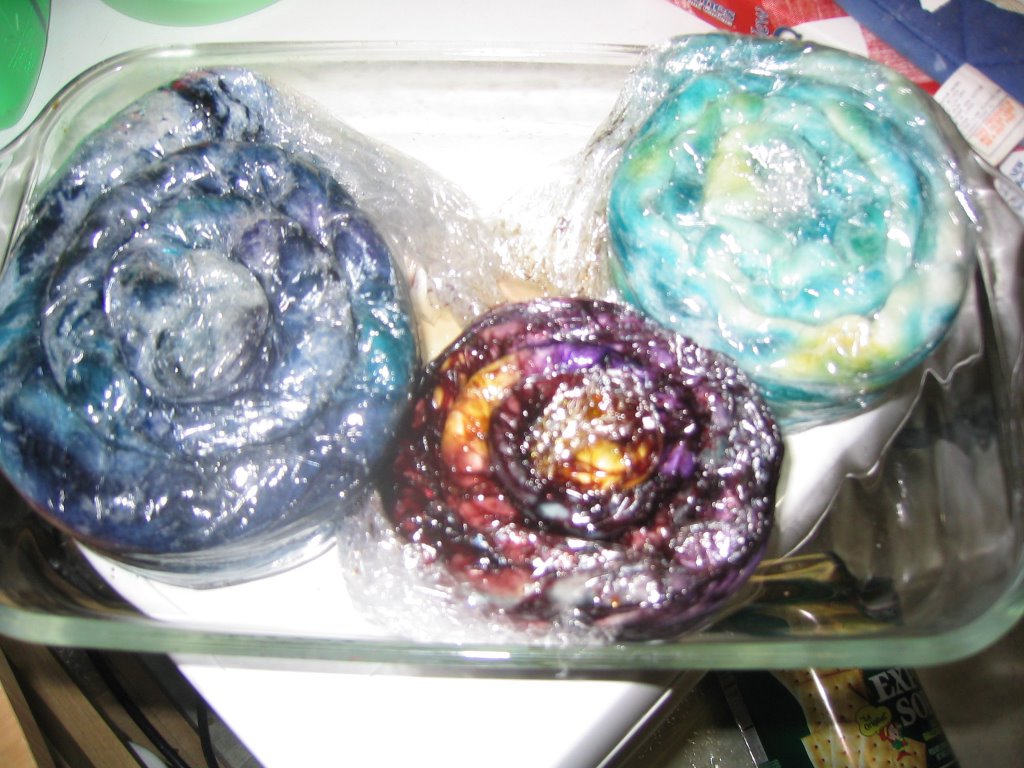 and then into fiber buns like this.
Step 7:
Nuke it! Place the buns (I'm afraid of what kind of searches are going to get to this site with all the BUNS!) into a microwave safe bowl and set it on high for 3 min. I like to put a few in each batch. After it is done let it rest for 3-5 min and nuke again for 3 min. I usually do this 2-3 times.
Step 8:
Wait for them to cool. This is the hardest part, I have been known to almost scorch my hands removing the hot (Note: VERY HOT!) fiber from the wrap to make it cool faster...this is not a good idea! If you let it rest over night the dye will have even longer to work on the fiber and you will get more brilliant results.
Step 9:
Remove the plastic wrap and dunk your fiber to rinse. Be patient with the plastic wrap it might have melted onto itself so you'll have to rip it open, but make sure not to rip the roving! Fill your sink up with room temp water and put the dyed roving in to remove all excess dye.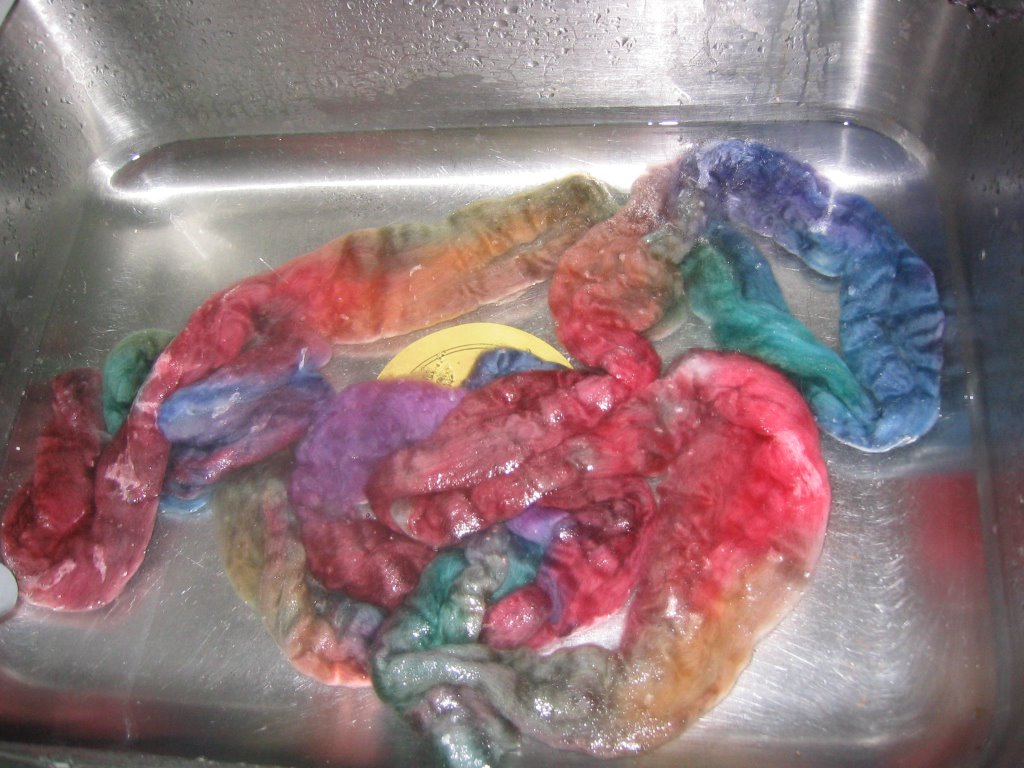 Make sure not to over agitate it you don't want felt! Just dunk it under a few times, if you have a lot of dye, keep refilling the water until all the dye is out. Then squeeze out excess water - don't wring - see above reason, and set aside.
 look at all that dyed pretty stuff!!!
Step 10:
Hang it up to dry! I use some plastic hangers and my shower rod.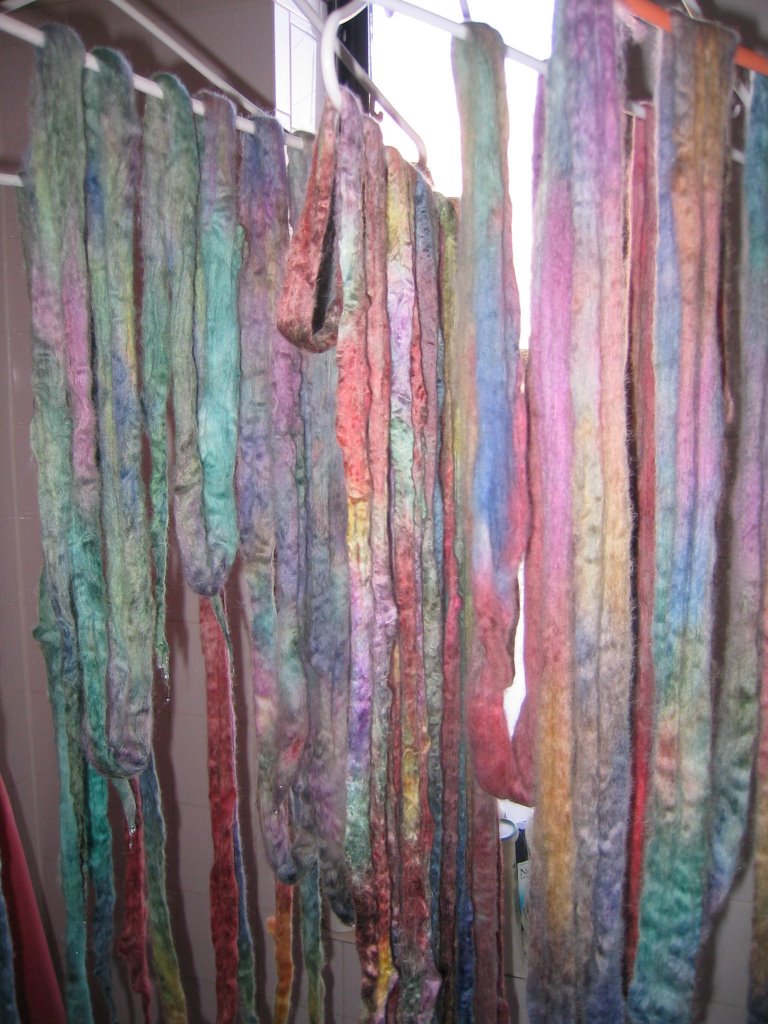 Right now they look a bit like psychedelic wet cats, but in a day or two they will be lovely and fluffly spinable fiber or knitable yarn.
Let me know if you have any questions. Or if I missed something, I'll post the dried results...umm when they are dry!
Tuesday, November 01, 2005
Fiber and Yarn Dyeing Tutorial - or how to dye cool stuff
Subscribe to:
Comment Feed (RSS)

|